
How to Tint Your Brows at Home (Like a Pro)
Tinting your brows at home might sound intimidating, but with the right products and a little know-how, it’s totally doable—and can give you fuller, more defined brows in just a few minutes.
Whether you’re after a polished, low-maintenance look or just want to cut down your makeup routine, at-home brow tinting is a game-changer. And with the 2-in-1 Lash & Brow Tinting Kit by The Brow Technicians, it’s easier than ever.
Let’s break it down step-by-step so you can get salon-worthy results from your bathroom mirror.
What You’ll Need:
-
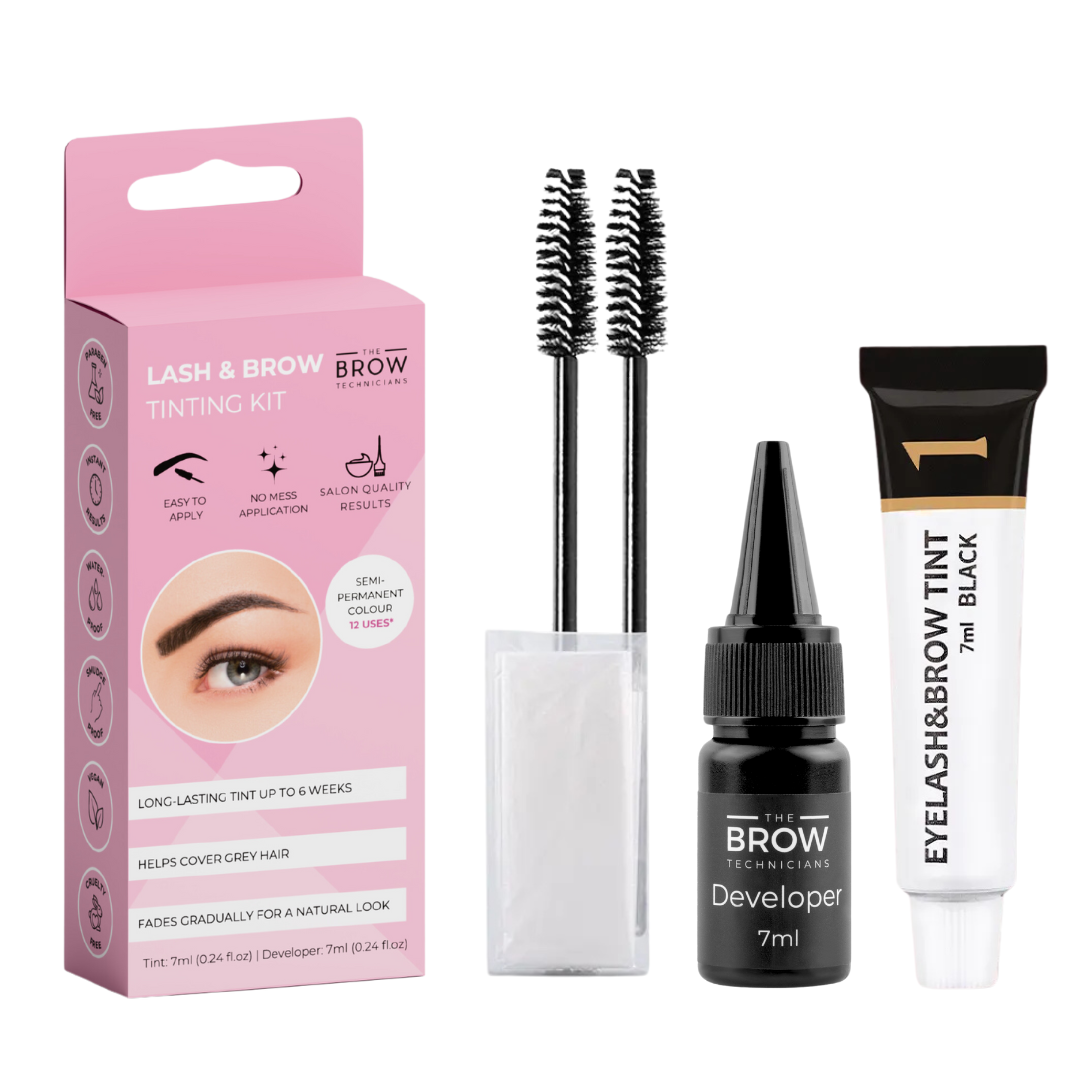
The Brow Technicians 2-in-1 Lash & Brow Tinting Kit $24.99
(Includes: brow/lash tint, developer, gloves, and applicator wand) -
Cotton pads or swabs
-
Petroleum jelly or barrier cream (optional, for protecting skin)
-
Mixing Dish
-
A mirror and good lighting
Step-by-Step: How to Tint Your Brows at Home
Step 1: Choose the Right Shade
Pick a tint shade that complements your hair colour and skin tone. The Brow Technicians offer a range of natural-looking options—go slightly darker for bold brows, or a touch lighter for a soft, everyday look.
Step 2: Clean & Prep
Start with a clean, makeup-free face. Remove any oil, skincare, or residue from your brows.
Tip: Apply a thin layer of petroleum jelly around your brows to avoid staining your skin (optional but helpful for first-timers).
Step 3: Mix the Tint
Using the mixing dish, combine equal parts tint and developer (usually about a pea-sized amount of each). Mix well until the texture is smooth and creamy.
Step 4: Apply Carefully
Use the spoolie or angled applicator to apply the tint to your brows, following your natural brow shape. Start from the inner corner and work outward. Make sure the hairs are fully coated.
Leave the tint on for 5–10 minutes, depending on your desired intensity. The longer you leave it, the deeper the colour—but always do a patch test first!
Step 5: Wipe & Reveal
Using a damp cotton pad, gently remove the tint. Avoid rubbing too hard. You’ll instantly notice your brows look more defined, full, and shaped—even without makeup.
Brow Tinting Tips:
-
Start with less time—you can always reapply if you want a darker result.
-
Tint your brows every 4–6 weeks for maintenance.
-
Store your kit properly for multiple uses (great value!).
Why People Love At-Home Tinting
-
Saves time: No more filling in brows every morning.
-
Low maintenance: Wake up looking put together.
-
Budget-friendly: Salon results without the salon price.
Ready to Try It?
The 2-in-1 Lash & Brow Tinting Kit by The Brow Technicians has everything you need to master the art of at-home tinting—whether you’re a beginner or a beauty DIY pro.
Shop the kit and give your brows the glow-up they deserve:
Shop now