How to Do Your Eyebrows Step by Step for Beginners?
Achieving the perfect eyebrows can be a bit daunting, especially if you’re just starting out. But with the right tools and a bit of practice, you’ll be on your way to fabulous brows in no time! The Brow Technicians Stamp and Stencil Kit is your go-to solution for beautifully shaped brows. Let’s dive into a step-by-step guide to help you get those brows looking on point!
Step 1: Gather Your Supplies
Before you get started, make sure you have everything you need within reach:
- Brow Technicians Stamp and Stencil Kit
- Eyebrow powder (included in the kit)
- Spoolie brush (included in the kit)
- Stencils (included in the kit)
- Tweezers (for any necessary touch-ups)
- A well-lit mirror
Step 2: Choose the Right Stencil
The Brow Technicians Stamp and Stencil Kit includes 10 different stencils designed to suit a variety of face shapes and brow styles. Here’s how to find the right one for you:
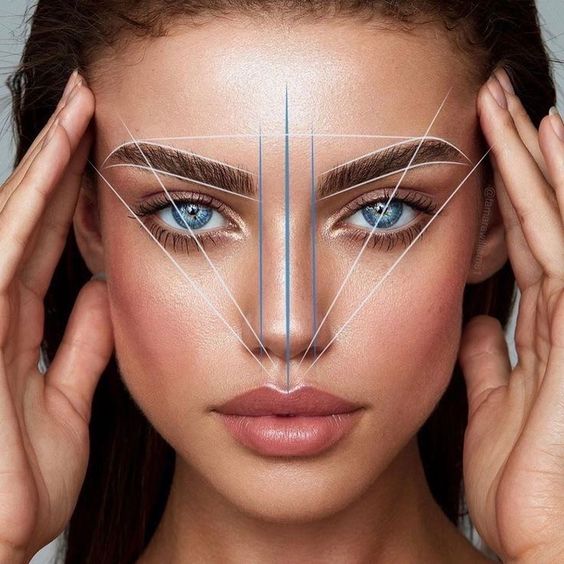
1. Assess Your Face Shape: Take a moment to look in the mirror and determine your face shape (oval, round, square, etc.). This will help you select a stencil that
complements your natural features.
2. Try Different Options: Hold different stencils against your brows to see which shape suits you best. Feel free to experiment until you find your ideal match!
Step 3: Prepare Your Brows
To get the best results, ensure your brows are clean and dry. Here’s how to prepare:
Tweeze or Trim: If you have any stray hairs, gently tweeze or trim them to create a tidy canvas.
Brush: Use a spoolie brush to comb your brow hairs upward. This will help you see the natural shape of your brows and identify any areas that may need filling in.
Step 4: Position the Stencil
Once you’ve selected your stencil, follow these steps:
1. Align the Stencil: Place the stencil over your brow, aligning it with the arch and tail of your natural brow shape. Make sure it sits comfortably and securely.
2. Hold in Place: Use one hand to keep the stencil steady while you apply the eyebrow powder.
Step 5: Apply the Eyebrow Powder
Now it’s time to add some colour:
1. Dip the Stamp: Use the stamp included in the kit to pick up the eyebrow powder.
2. Press and Apply: Gently press the stamp onto the stencil, ensuring even coverage. Leave the front of the stencils lighter, for a more natural appearance.
3. Remove the Stencil: Carefully lift the stencil away to reveal your beautifully shaped brow!
Step 6: Refine and Blend
With the basic shape in place, it’s time to refine your brows:
Use a Spoolie: Brush through your brows with a spoolie to soften the look and blend the powder for a more natural finish.
Touch Up: If needed, use the stamp or a small brush to fill in any sparse areas for a seamless look.
Step 7: Set Your Brows (Optional)
For all-day wear, consider using a brow gel or wax to keep everything in place:
1. Choose a Clear Gel: The Brow Technicians Brow Set Gel will help set your hairs without adding any extra colour.
2. Apply: Use the spoolie to apply the gel, brushing your brow hairs into your desired shape.
Step 8: Admire Your Work!
Take a moment to admire your perfectly shaped brows. With practice, you’ll gain confidence in your technique and can experiment with different styles and shapes!
Conclusion
The Brow Technicians Stamp and Stencil Kit makes achieving beautiful brows easy and accessible for everyone, especially beginners. With its user-friendly stencils and high-quality eyebrow powder, you can create flawless brows in just minutes. So, grab your kit and kickstart your eyebrow journey today!
For more information or to purchase the Brow Stamp and Stencil Kit, visit The Brow Technicians.